Integration Settings
Administration > System Setup > Integration Settings
Integration Settings determines the file type for general ledger account export files, the invoice export settings files, and reimbursement export settings created from the Transaction Search page on the Parks & Rec tab.
Financial System Selection
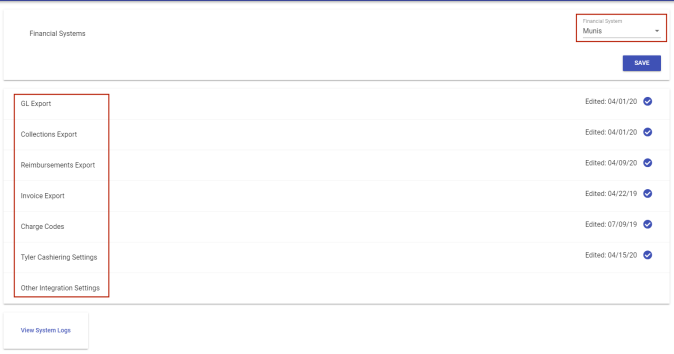
Your selection from the Financial System drop-down in the top-right corner of the page determines what exports appear on individual cards below the selection.
Export File and Service Setup
To set up an export file or service, click the corresponding export card to expand it:
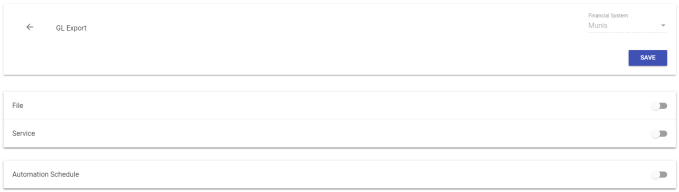
To have a File or Service generated from the export page, move the corresponding toggle button to the right, and click the SAVE button under the Financial System field:
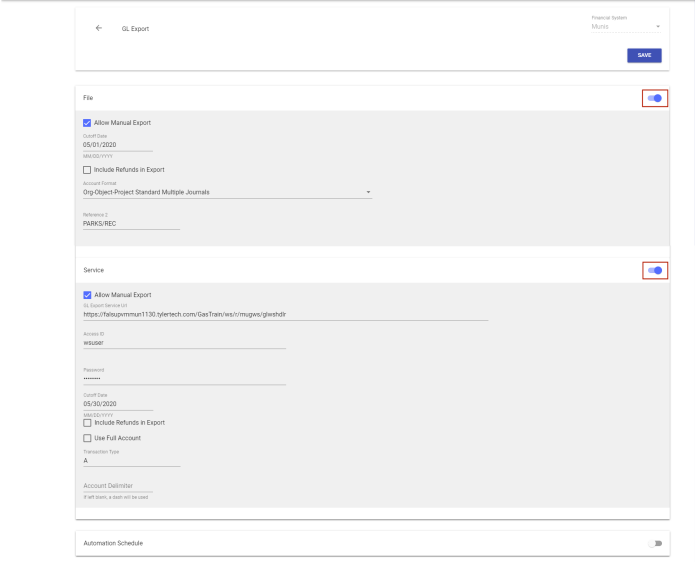
Depending on the financial system selected, additional fields may be available on the File and Service cards. The availability of the File and Service cards themselves also depends on the system selected.
The Service card always contains fields for the selection of a destination URL, user name and password. The password may be typed in manually or pasted in using Ctrl+V. The right-click > paste option is not available.
Use the Allow Manual Export check box on the File and Service cards to enable and disable manual export buttons on the corresponding export pages:
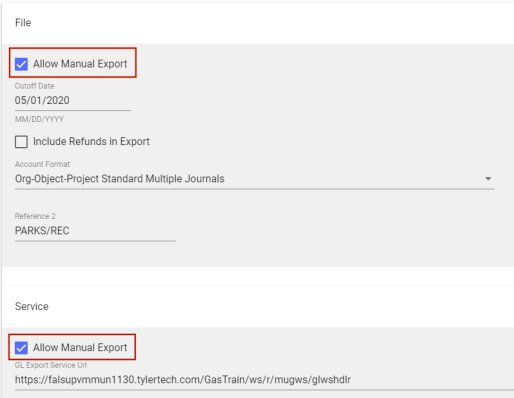
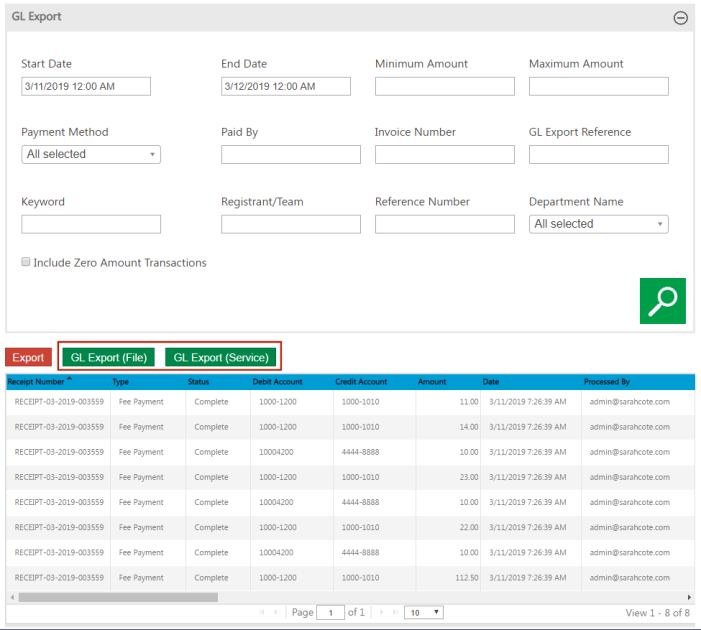
Selecting this check box on the File card enables a green export button on the corresponding export page with the word File in parentheses. Selecting the check box on the Service card enables a green export button with the word Service in parentheses. Selecting the check box on both export types enables both export buttons, one for file and one for service, as shown below:
Those using the Munis charge code service can verify their service and the returned charge codes directly from the Integration Settings page:
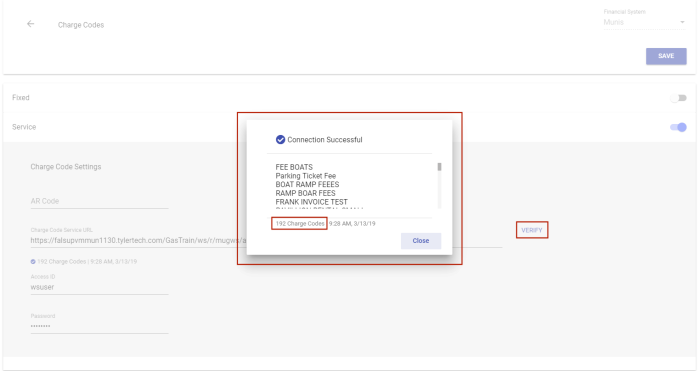
The charge codes returned will be available for selection in the Charge Code drop-down on the individual Fee Details pages in Administration.
The current date is appended to the end of export file names. This date also is captured as part of the export reference for the transaction.
For each Munis export type, ensure that the general ledger accounts in Parks & Rec match valid accounts in Munis. The accounts must be in the same format--that is, org/obj/project or full account. The default format is org/obj/project. Select the Use Full Account check box to use the full account format for the export files.
For File-CSV, specify the file prefix that is used in the export file name.
For Service-Munis GL, specify the service endpoint for the Munis general ledger in the GL Export Service Url field, and provide the Munis web service user name and password.
For each Munis type, the Transaction Type indicates whether the transactions are actual (A) or encumbrance (E).
For File-Incode, general ledger transactions may be exported to a file that may, in turn, be imported to Tyler Incode V.X Financials or Invision file.
The Invoice Export Settings support the invoicing process for class registrations processed using the Parks & Rec tab.
Charge Codes Settings enables Parks & Rec fees to be associated with Munis charge codes.
- Fixed-Munis: The AR Code and Charge Code fields are available. Use the fields to define the Munis accounts receivable code and charge code for the exported invoices.
- Service-Munis: The AR Code, Charge Code Service, Access ID, and Access Password fields are available. Charge Code Service is the service endpoint URL, which should be designated as a Munis web service. In this case, the Charge Code field is available on the Fee Details page. The drop-down lets you assign Munis charge codes to fees.
Reimbursement Export Settings defines the reimbursement export files. The Reimbursements list in Transactions provides the option for exporting instructor payments to accounts payable.
Collections Export Settings defines the type of export file created by the Collections Export. The Collections Export creates a file of Parks & Rec payment information that may be used in balancing your organization’s daily deposit.
The Collections Export Service settings for Munis contain an Include Department in Export check box:
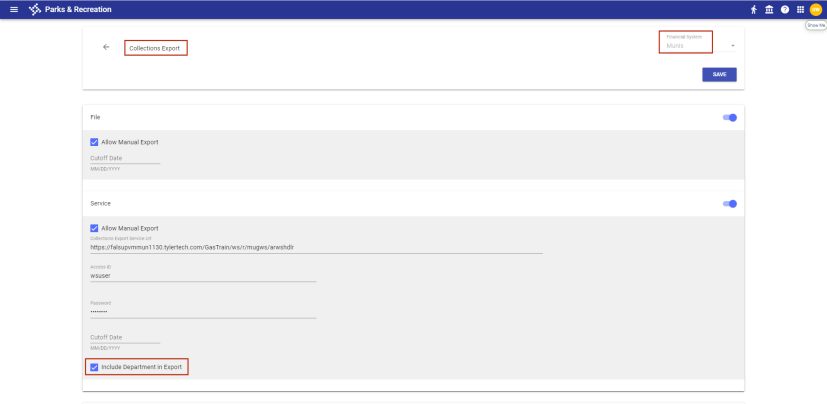
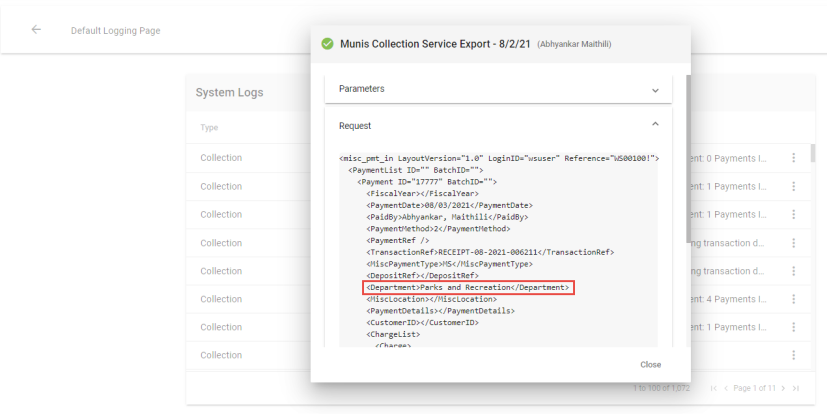
Selecting this check box adds the department name to a service request:
League Setting
Parks & Rec integrates with QuickScores to facilitate league management. On the Integration Settings page, the League Setting lets you enter the complete league URL.

The URL does not include the class ID, which will be added when you link the class from the Class Details page for a team event; for example, the initial URL setting will be http://www.quickscores.com/Orgs/PrintSchedule.php?OrgDir=demo&LeagueID=. When linked on Class Details, the class ID is added, making the URL http://www.quickscores.com/Orgs/PrintSchedule.php?OrgDir=demo&LeagueID=6733.
Parks & Rec uses system tender type mapping from Cashiering if the Use Payment Method Mapping checkbox is marked.
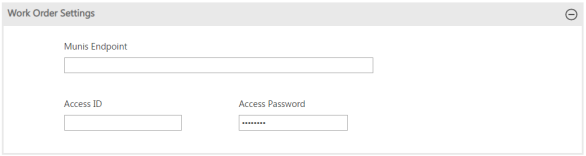
Work Order Settings
Parks & Rec integrates with Munis Work Orders to let you create work orders related to rental items. The Munis Endpoint, Access ID, and Access Password fields store the integration access entries for the integration.
Automation Schedule
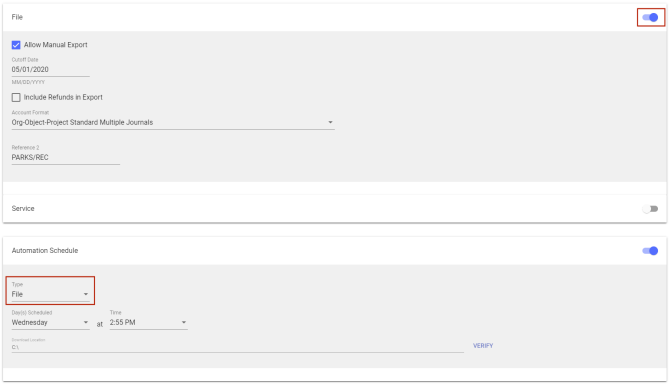
The Integration Settings page also provides an Automation Schedule card that lets you automatically generate a file or a service on existing exports and tie it to a schedule; for example, you may have an export file run on a selected day of the week and time and dropped into an available file path location on the server:
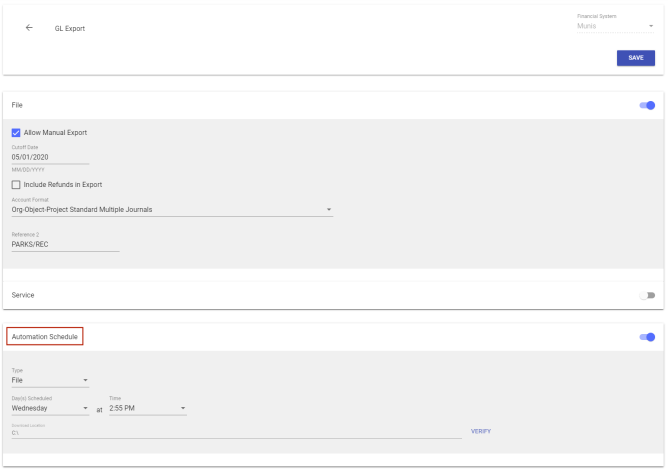
For the File or Service option to be available as a selection in the Type field, the toggle must be in the active position on the corresponding card:
To verify the server containing the file is able to drop the file into the Download Location specified or, in the case of a service, the https request is able to reach the URL specified, click the VERIFY button. You will receive a message telling you whether the location is valid:
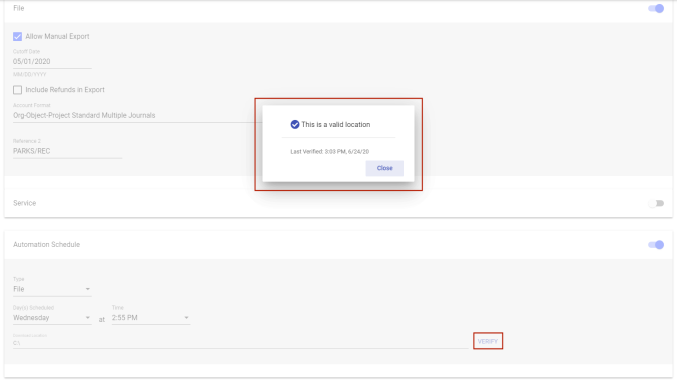
An invalid message instructs you to make sure the application has create and update access to the location.
Note: You may set up an automation schedule for a file or a service, not both.
To save your selections on the Integration Settings page, click the SAVE button under the Financial System field.
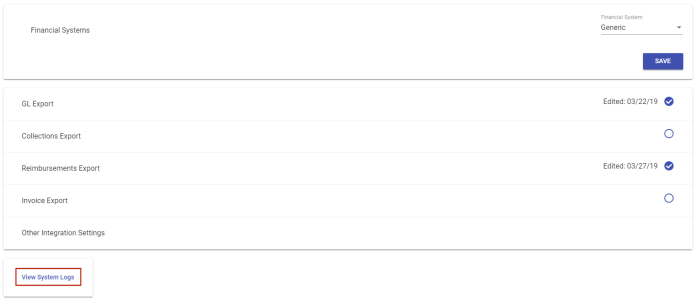
View System Logs
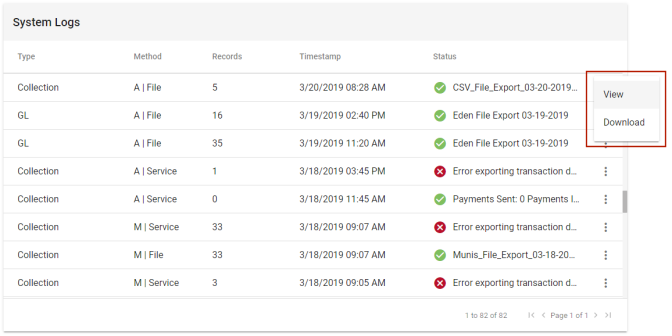
The View System Logs button at the bottom of the Integration Settings page opens a System Logs page containing export history, with each export displayed on a card:
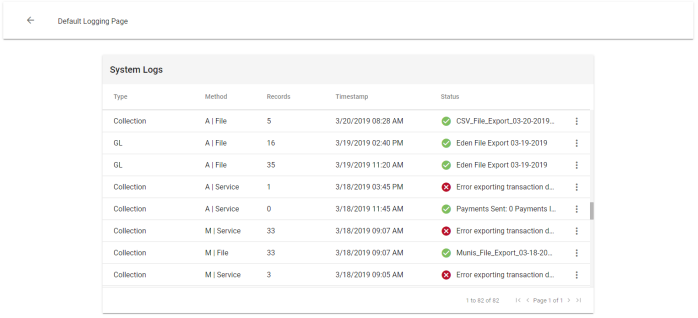
Each card shows the type of export, the method (file or service and manual or automated), the number of records exported, the date and time of the export and the status of the export.
Status Keys
|
File Method |
|
|---|---|
|
Status |
Description |
|
|
Success: File generated and successfully dropped into location, if one was named. |
|
|
Error: Drop location not available or accessible. |


|
Service Method |
|
|---|---|
|
Status |
Description |
|
|
Success: Request sent, analyzed and accepted. |
|
|
Error: Request sent, no response; not able to generate https request; not able to make connection with server; or, after generated and analyzed, error found. |
Action Menu
Click the vertical ellipsis  on the far-right of any system log card to open an action menu with options to view and download export details:
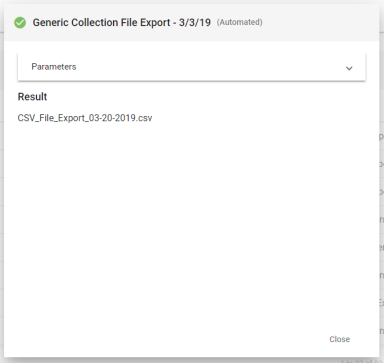
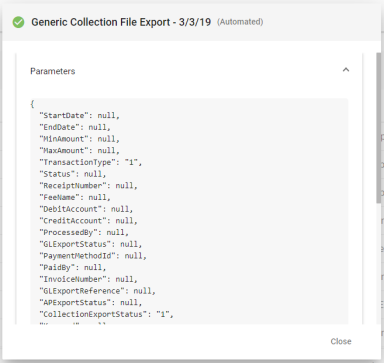
View File
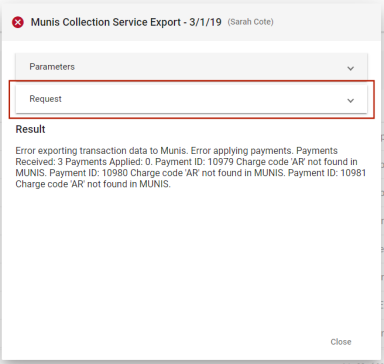
For a file, the View option opens a pop-up that shows the date of the export, whether it was run automatically or manually, the parameters used to run the export and the result—in this case, the name of the actual file created. If the export was run manually, the name of the user who ran it displays:
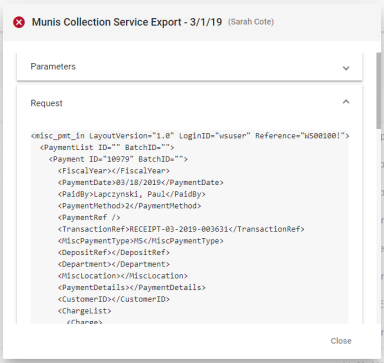
View Service
In addition to providing the same information as the file pop-up, the service pop-up includes details of the actual request that was sent: